sustainable design

Sunny Acres Residence by Gregory Upwall

Moab, Utah is known for its phenomenal sandstone formations and vast open space for outdoor activities. The clients came to us with this site set amidst the beauty of the desert landscape surrounded by panoramic views. When we first visited the site we were awestruck by the beauty and grandeur of the red rock cliffs, valleys, and canyons that create a stunning and magnificent setting to behold.

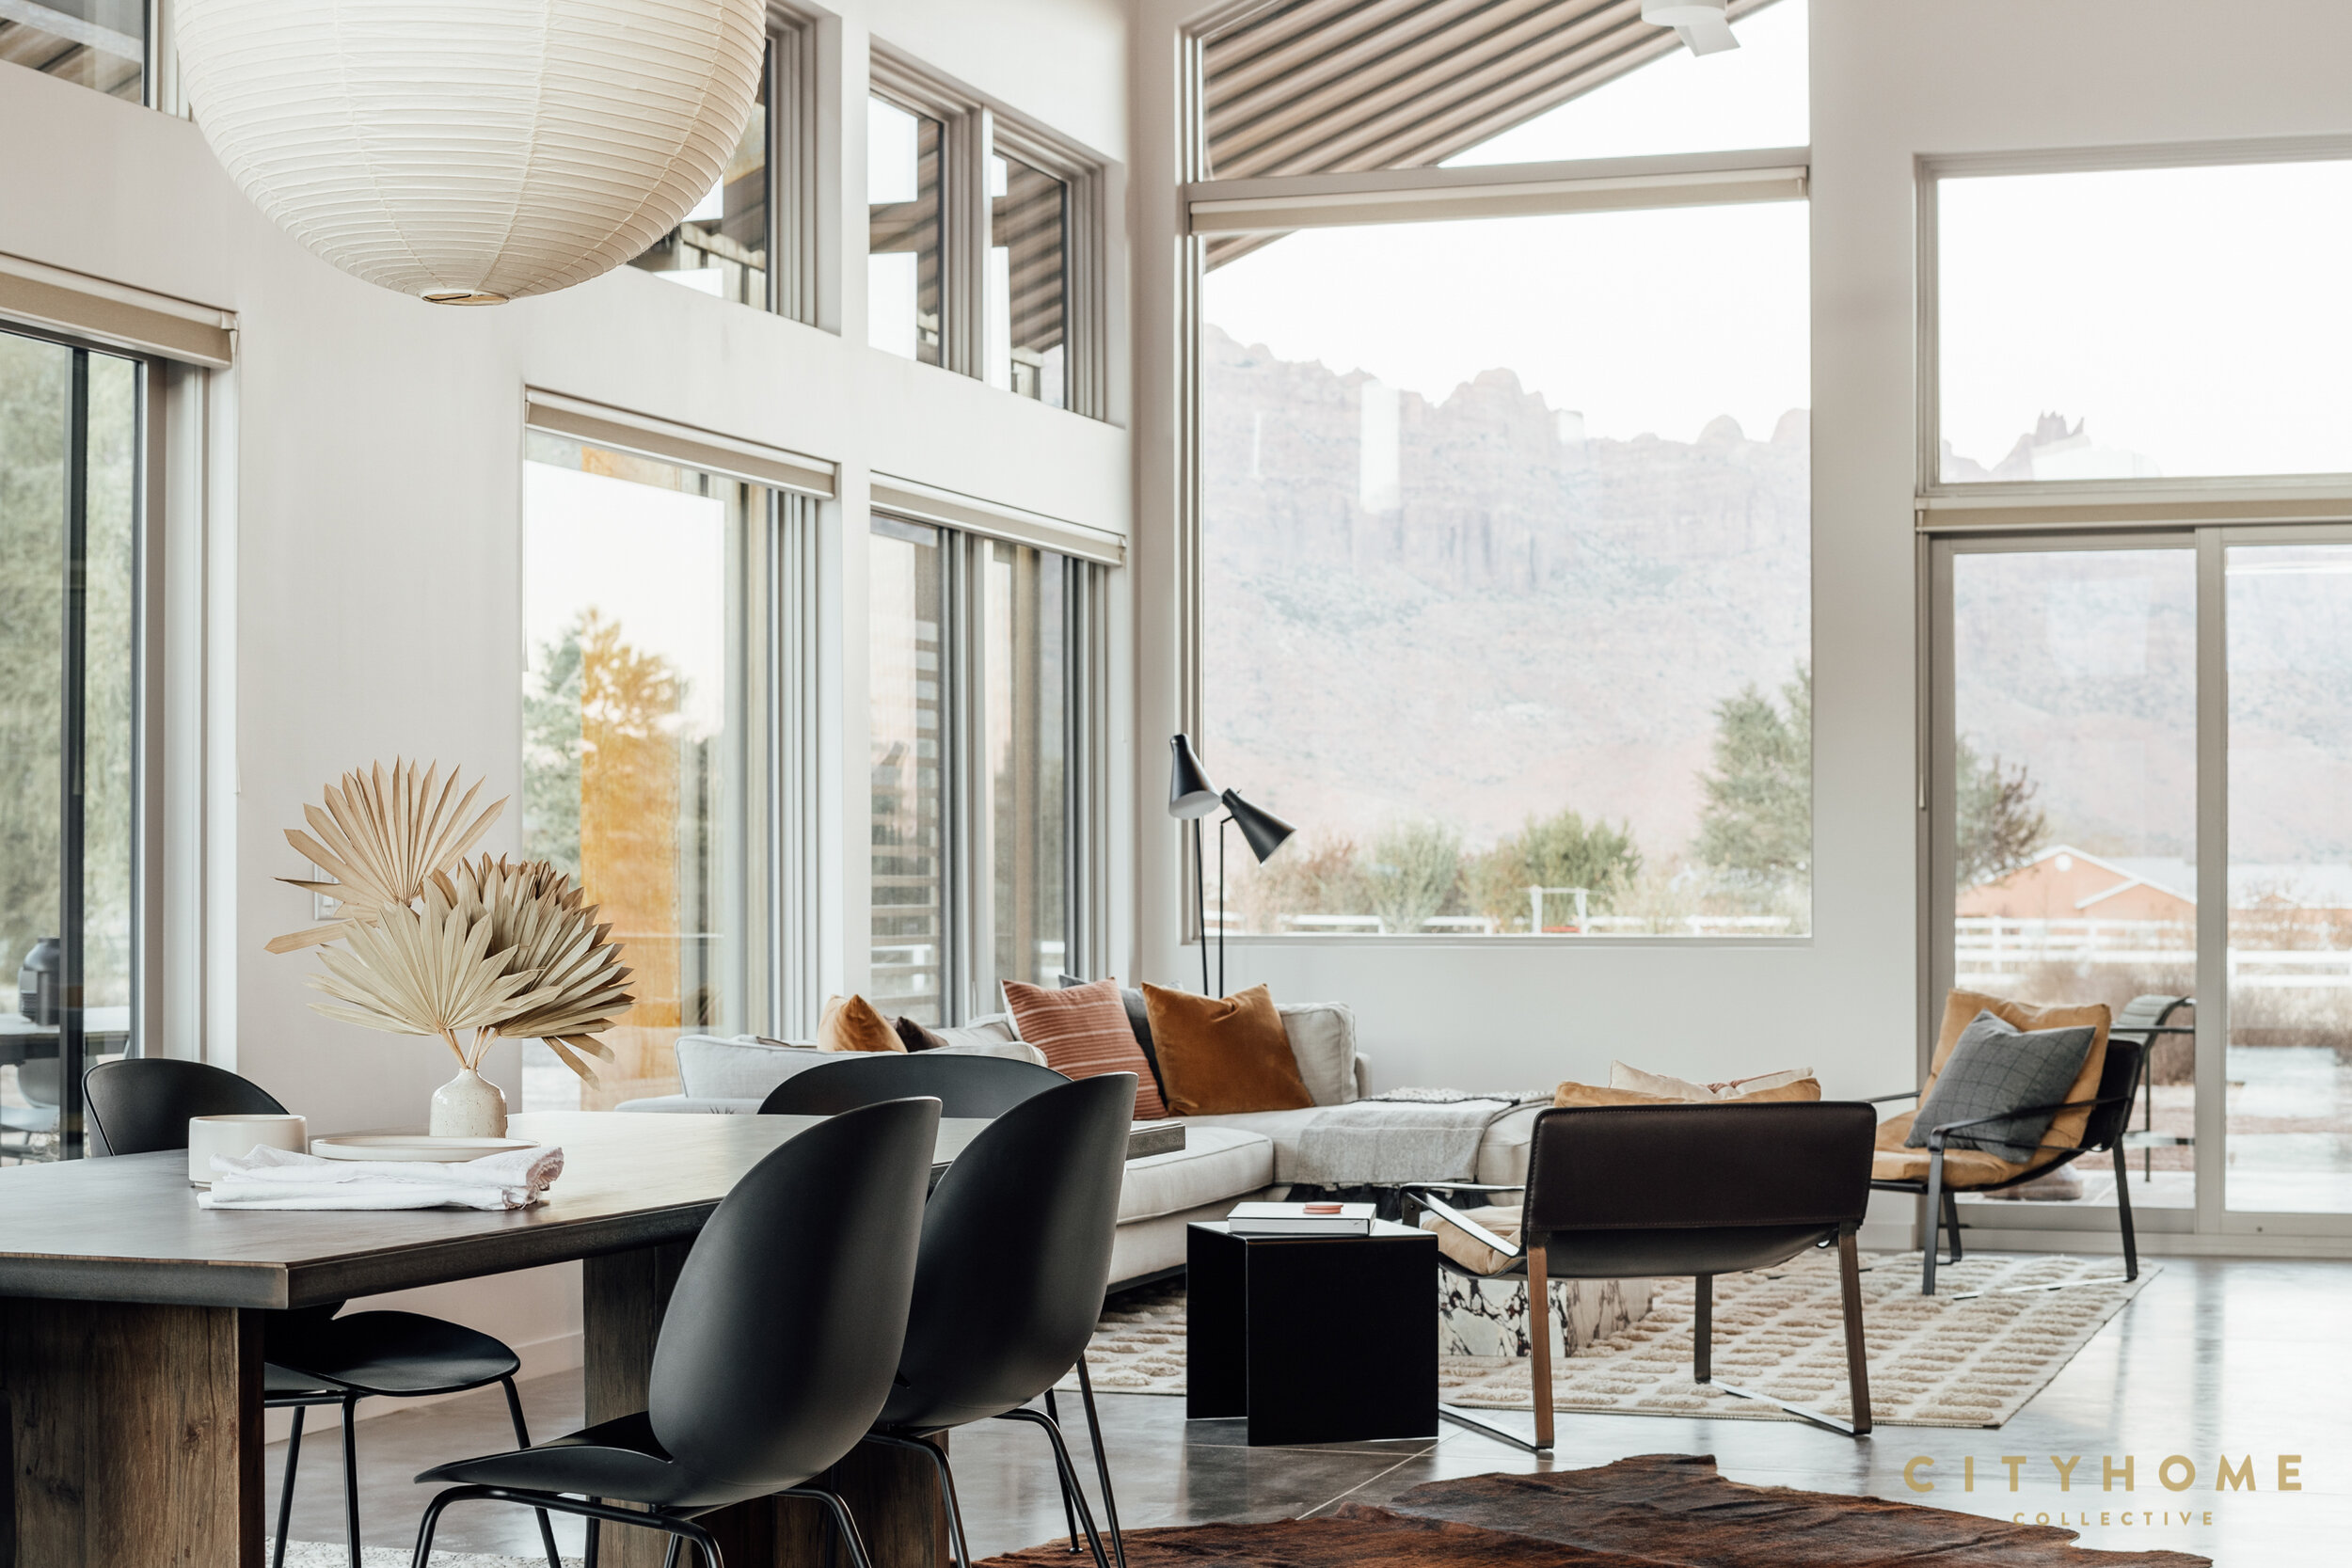
There are certain projects where the relationship to the site is essential and this project was certainly one of them. The 2,000 sq. ft. home is simple in function and form with an asymmetrical gable roof volume that is extruded along the main axis of the house to form an exterior shroud that protects the interior spaces from the harsh desert climate. The orientation of the house on the site aligns with the sun’s path. The long axis of the house is focused to the east toward the point where the sun rises over the La Sal Mountains and to the west where the sun sets over the southern Utah cliffs. The common living, cooking and dining space of the house is located within this volume, allowing occupants to experience the sunlight as it moves through the space throughout the day.

moab-modern-design-3.jpg


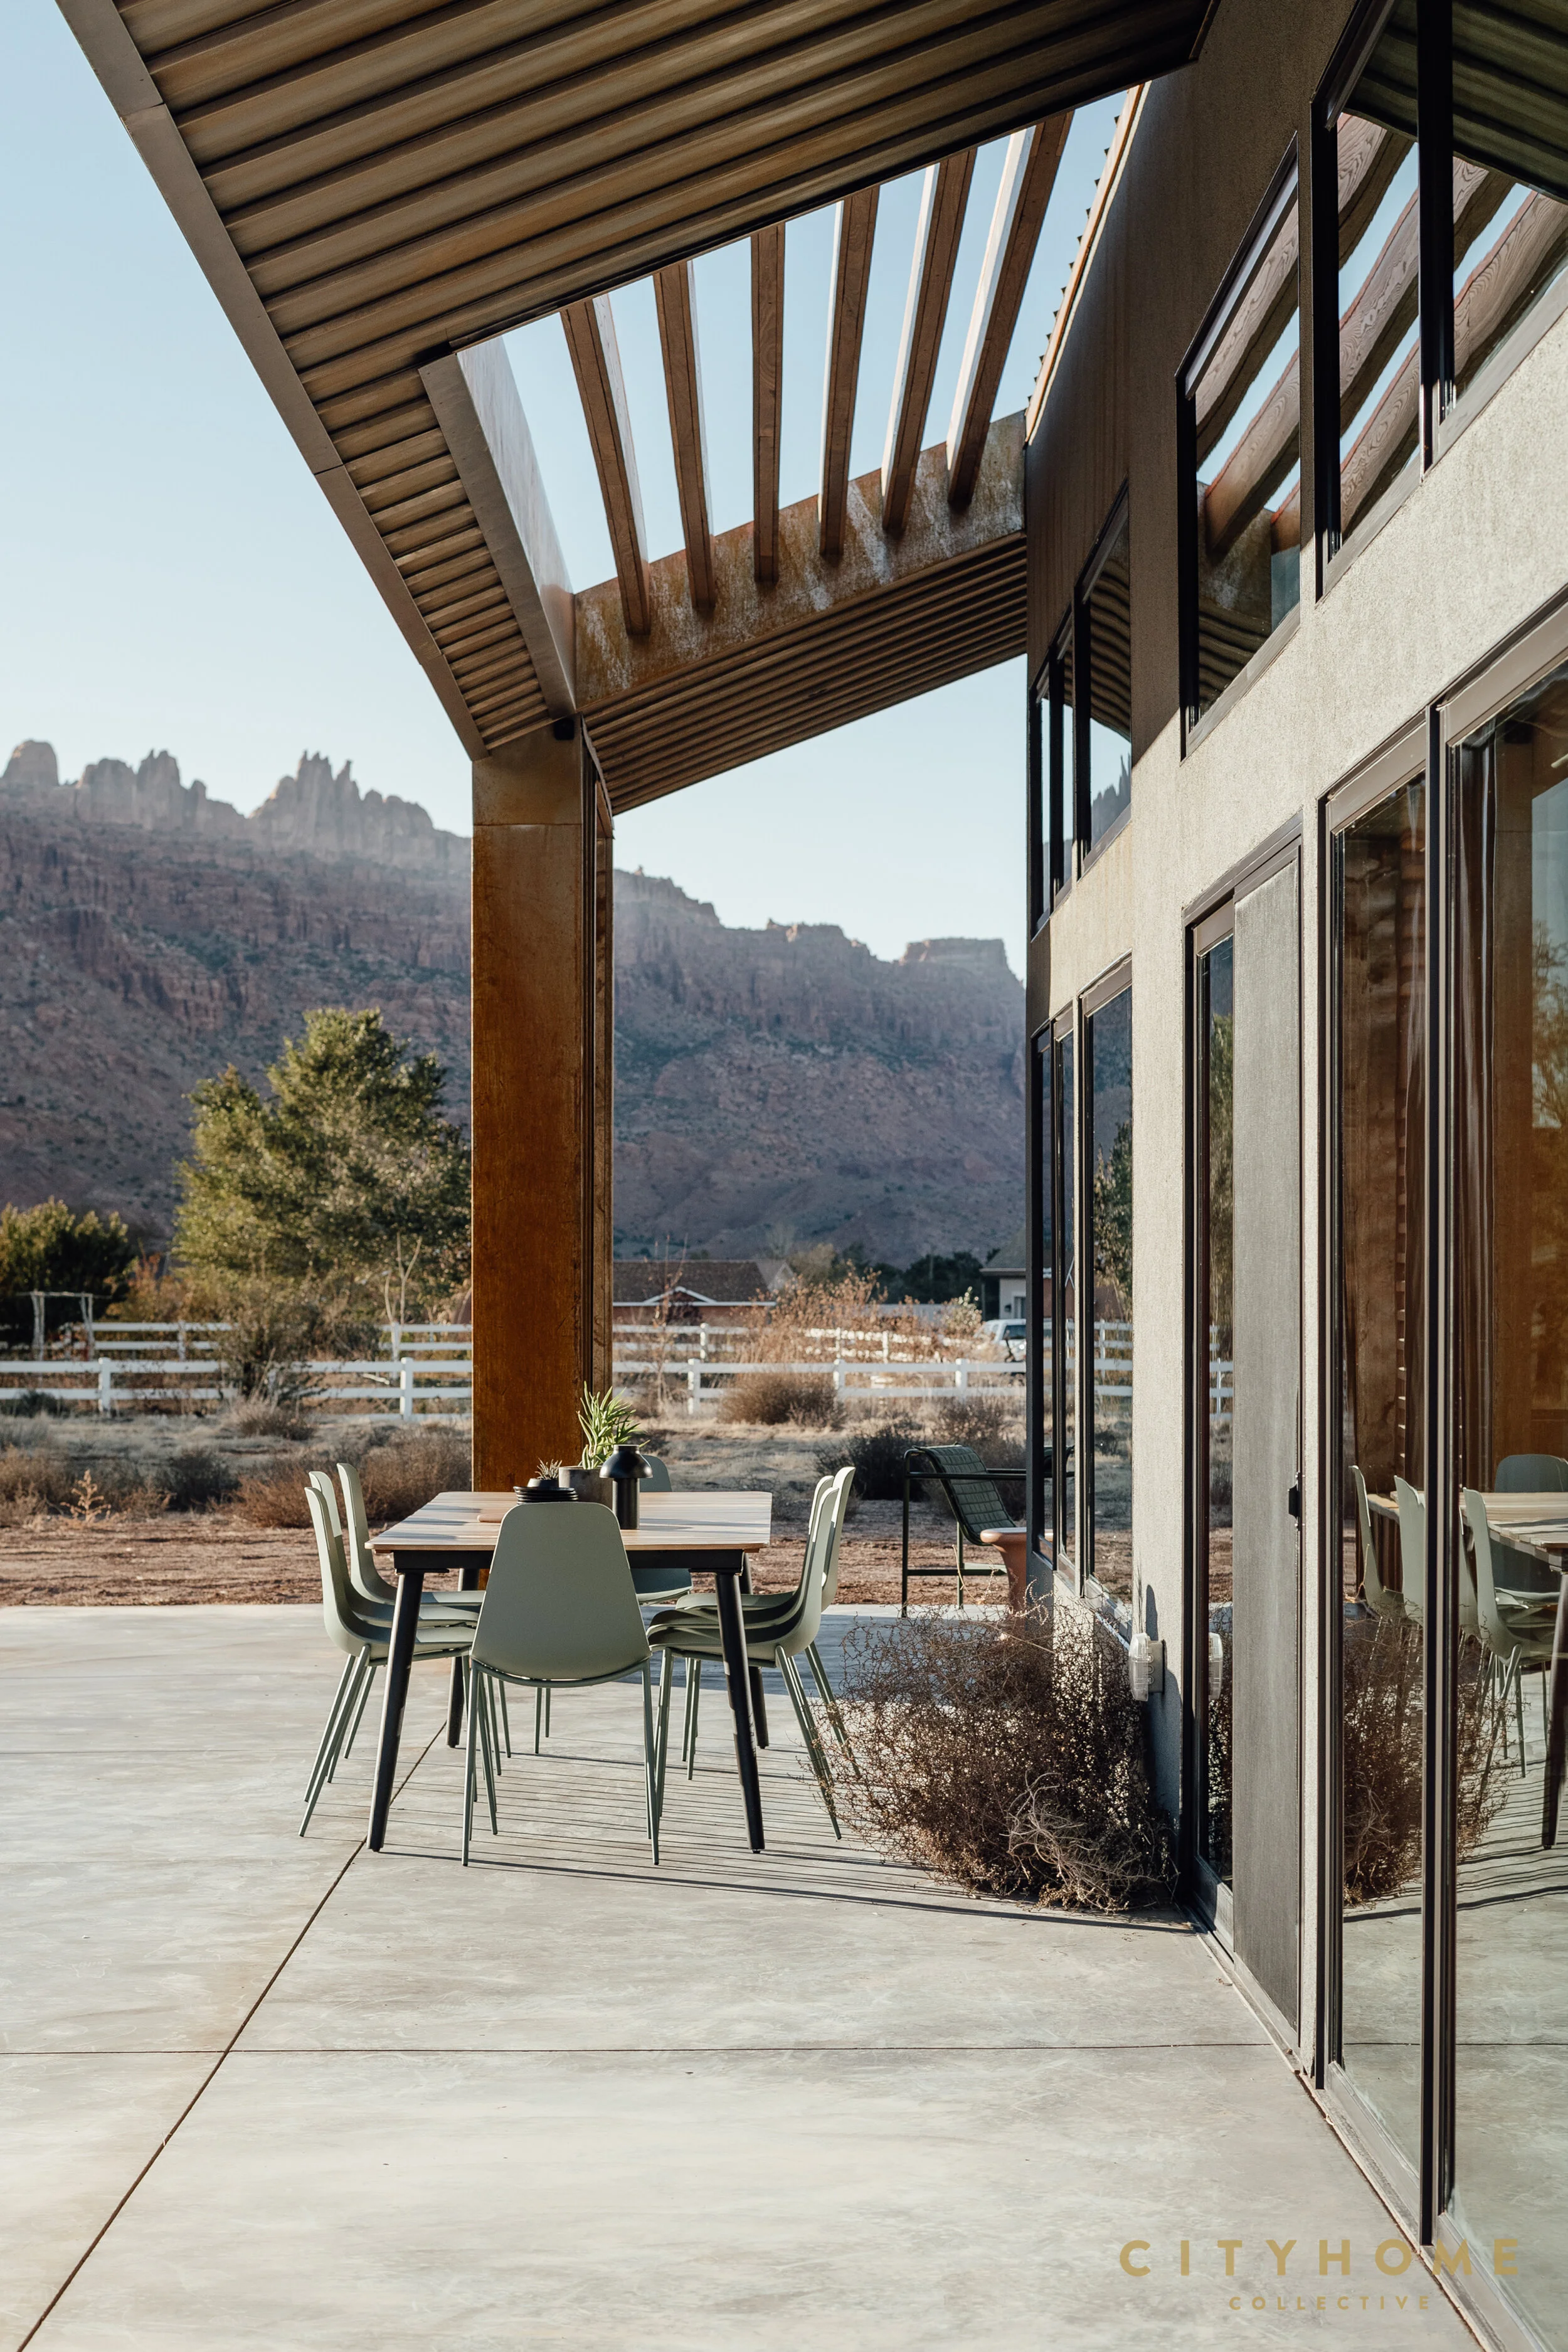
The material selected as cladding for the large exterior extruded roof form is a natural steel panel that is allowed to rust on the surface, creating a patina and pattern that references the red-orange sandstone cliffs. Weathered wood boards are placed around the doors and windows providing a similar but softer texture in the areas where one enters the house. The concrete floor slab is continuous from the interior to the exterior to reinforce the sense of continuity from inside to outside.

The southern wall, punctuated with a series of glass doors and windows designed to provide a connection to the landscape and panoramic views, is set in under the deep overhang of the roof to deliver shade in the hottest months. There is a hidden loft set at the top of the volume accessed by a simple ladder that offers an ideal space for reading and reflection. The bedrooms and bathrooms are all aligned along the lower north side of the house that has smaller horizontal windows to create view portals while retaining a sense of intimacy and privacy.

moab-modern-design-25.jpg
moab-modern-design-14.jpg

Sustainable strategies played an important role in the design of the house. Studio Upwall collaborated with Eco Logic Design-Build who specializes in high-performance construction. They were able to minimize the environmental impact of the house by using structurally insulated panel construction, energy recovery ventilation, radiant floor heating, etc.

The garage building, designed as a similar volume as the main house was clad in the same patina steel panels.

moab-modern-design-13.jpg

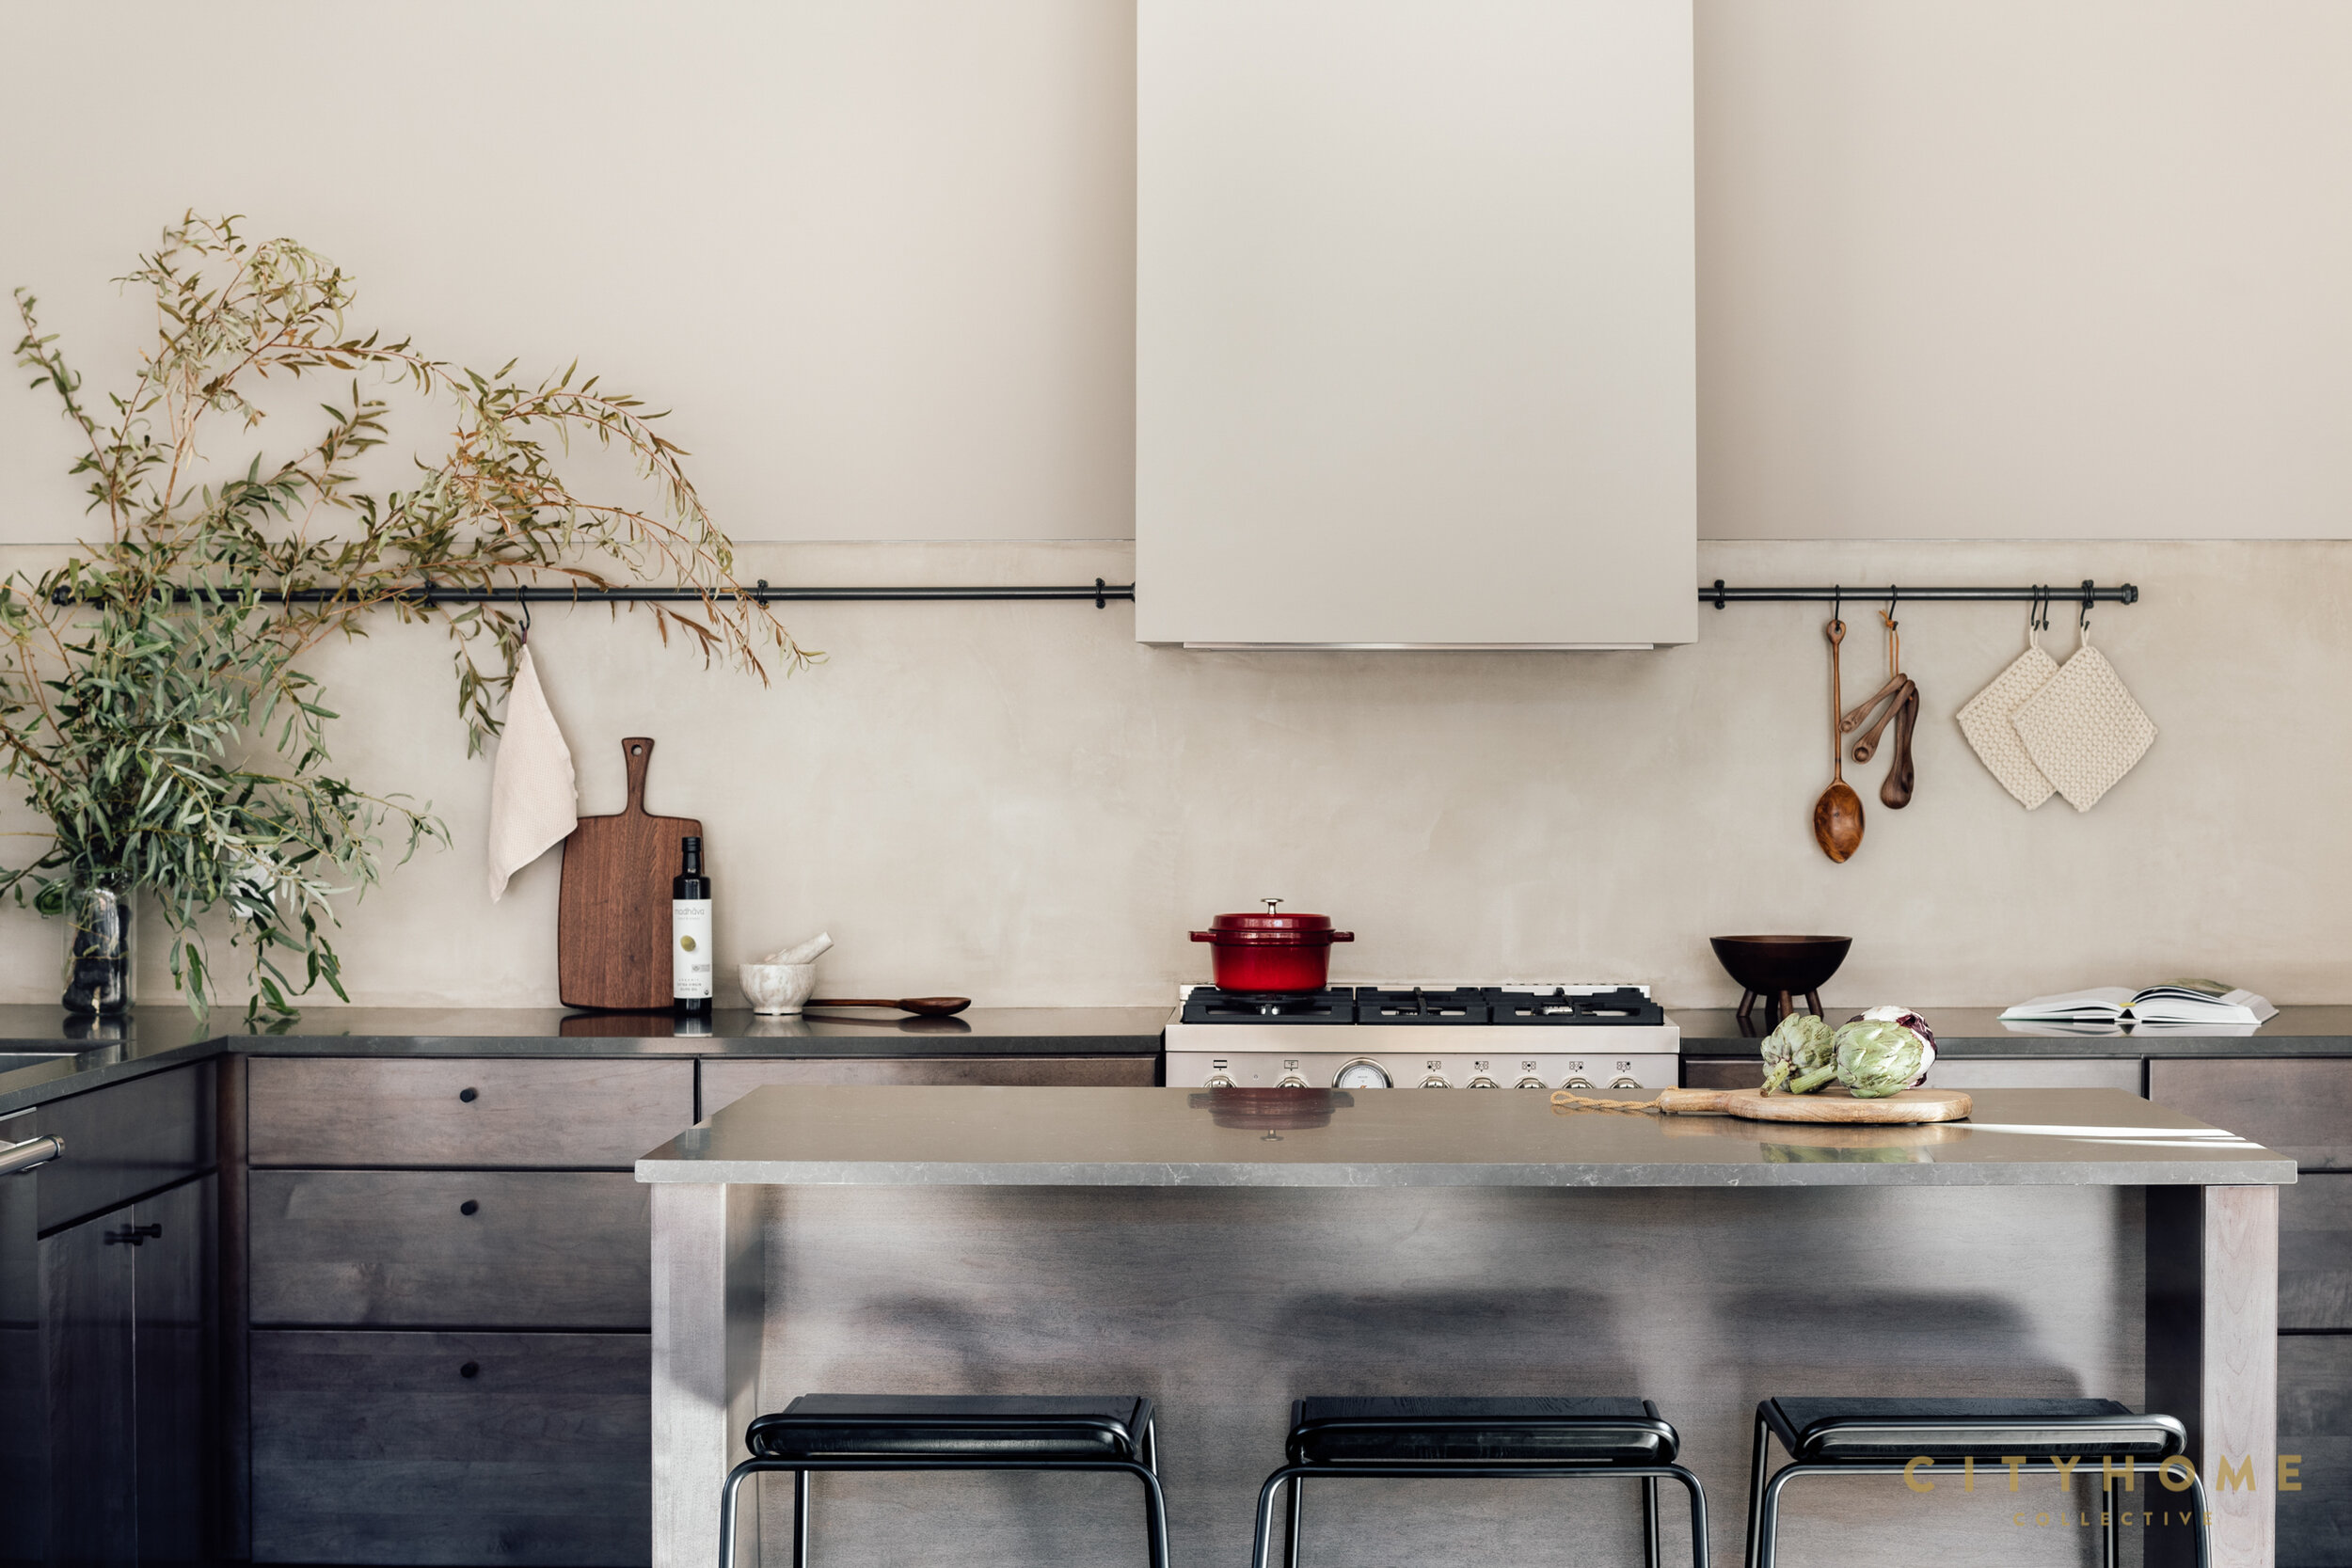
Photos and Interior design by: City Home Collective

DC Rowhouse Renovation - Finishing the Interior by Gregory Upwall

With the exterior of the house mostly complete our focus turned (finally) to interior finishes. It is at this stage that we finally get to start to see the inside come to life. It all starts with drywall (the technical name is gypsum board). The drywall was installed by a crew of about 6-7 guys, and they had the entire house done in less than a week. Next came tile. We selected simple and classic tile from Dal-Tile that was not a budget breaker, but that still gives a clean modern look to the bathrooms. Our tile setter worked for about 2 weeks personally setting each tile and working his way through each of the three bathrooms.

Next came the installation of the hardwood flooring and stair treads. Once installed they were sanded, stained and finished. After considering many different options we decided to go with select grade solid white oak (which has no knots) in five inch width. For the stain we chose a light grey that allows the beauty of the wood grain to show while still giving a lighter more modern feel to the space. Once the stain and finish coat were on we had to keep everyone out of the house for three days to allow the floors time to dry and cure.

view showing the underside of the white oak stair treads (the tops are covered and protected)

For the stair treads we worked with The Stair Guys, based in Hanover, Pennsylvania. We were very happy we found them – they are real craftsman who took the time to custom fit each stair tread and riser in place. Next came the interior doors and trim followed by cabinets, countertops, plumbing and lighting fixture installation, and finally paint. For the cabinets we worked with District Cabinets and were very happy with their collaboration and attention to our project. After a long journey, we finally have reached the point where we can call the house complete – and we are pleased with the result.

kitchen cabinets being installed

the basement floor finished, and covered to protect it during the final painting

DC Rowhouse Renovation - Energy Saving Measures – Solar Panels: by Gregory Upwall

View of the newly installed solar panels.

We worked with the team at Solar Solution for the design and installation of the rooftop solar photovoltaic system through the DC Solar Solution Program. The staff at Solar solution was able to provide an assessment of the available roof area and determine the optimal layout to maximize the configuration to achieve the maximum number of panels and the optimized power output of the system. Even on our very small roof they were able to install (14) 340 Watt panels, resulting in a 4.76 KW system.

View of the newly installed solar panels.

 They also handle all of the tax credits and the SRECs (Solar Renewable Energy Credits). Under the program we got an upfront SREC credit that covered 70% of the system cost. We had to pay for the remaining 30% of the system cost, BUT that will be refunded to us with our 2019 Federal Income tax returns as a Federal Income Tax credit. Meaning the final cost to us for the system will be zero dollars – that’s right, free.

 The installation required no penetrations of the roof membrane since the solar panels are installed onto a racking system that is simply ballasted to the roof and is designed not to damage the roof membrane.

 After the installation of the panels Solar Solution’s electrician installed the control box on the exterior wall (directly below the panels) that was then connected to the main electrical panel for the house. The final step will be for Pepco to install the new Net Energy Meter that will allow for tracking of both energy used and energy produced by the house. We will be able to monitor the energy production compared to the energy used in real time via an app on our phones. We are very excited to be able to start monitoring the output of the energy panels to see how much of the energy use of the house can be offset by the on-site solar production.

DC Rowhouse Renovation - Energy Saving Measures - Air Sealing & Insulation: by Gregory Upwall

Current building science research has discovered that the air tightness of the building envelope is very important to a building’s energy performance, thermal and moisture control, and indoor comfort. But most conventionally built buildings are sorely lacking in terms of air tightness, and this is particularly true for old brick buildings. Brick construction is not an inherently air-tight assembly, and in traditional masonry construction the wall assembly consisted of several whythes of bricks joined together with mortar. On this house the front wall was built with a better quality fine brick with tight thin mortar joints, while the side and rear walls were built from common brick with larger looser mortar joints. This was common practice for the side and rear walls of the rowhouse construction where the mortar often has gaps between the bricks.

 We hired Mid Atlantic AeroBarrier to perform the air sealing of the building. The process they use involved pressurizing the house and the emitting a vaporized sealant into the space. The sealant product the use is GreenGuard certified for low chemical emissions. The high pressure in the house causes the sealant to collect at the small cracks and seams as the air is escaping. As the sealant collects at the cracks they are gradually sealed and the building becomes tighter. The guys at Mid Atlantic AeroBarrier ran the process for about 2 ½ hours. When they started the pressurized house registered an air leakage rate of 11.41 air changes per hour (ACH). After 2 ½ hours their process had reduced the air leakage rate to 1.68 air changes per hour (ACH) – resulting in an 85.3% reduction in the air leakage of the building envelope! We could see visible areas where joints and cracks had filled with the escaping sealant. This is a simple yet ingenious process that seals the entire envelope including tiny joints that would not otherwise be able to be accessed.

 After the air sealing was complete, we were able to turn our attention to insulation. Since we have no attic we needed to achieve the maximum insulation values in the roof framing cavities as possible. We decided to go with closed cell spray foam as the first layer. 3” of foam was installed on the underside of the roof sheathing and 1” of foam was installed along the inside of the exterior walls. The remainder of the roof and wall framing cavities were filled with batt insulation. This gave us an R-51 at the roof and an R-20 in the exterior walls. This strategy of installing spray foam on the interior of the sheathing and then filling the remainder of the framing cavity with batt insulation is commonly referred to as “flash & batt” and draws on the inherent air sealing capacity of the spray foam as it expands and fills voids and cracks. The batt insulation is flexible and installs quickly to fill the balance of the framing cavities. With these air sealing and the insulation measures complete we are looking forward to improved energy efficiency, enhanced indoor noise control and thermal comfort. We think that it will all be well worth it when those bitter cold winter nights arrive.

This image shows the wall cavities with the layer of closed-cell spray foam applied.

new of the upper level showing the layer of closed-cell spray foam applied to the underside of the roof sheathing and to the interior of the wall sheathing.

This view shows the batt insulation installed in the wall cavities. Notice the white caulk joints and spray foam around the door frame that was installed as part of the air-sealing.

View at the upper level showing the batt insulation completed at the roof and wall cavities. (Also pictured: the drywall has been delivered and is ready to install).